Ancient monuments prove that brickwork withstands millennia. However, if you want to preserve its appearance, you must immediately repair all cracks and chips, especially in areas with a cold climate. Even the thinnest crack allows moisture to penetrate the wall or slab and continue its destruction in the freeze-thaw cycles. It is not difficult to repair such a crack using ordinary or liquid grout. The methods for masonry pointing, concrete, and plaster recovery described here also apply to pathways and paving, the only change is the direction of movement of the tools. However, the applicable method depends on the defect. The most common three types of defects are: crumbling of mortar in the joints, the destruction of part of the wall and the destruction of steps and paths. Here we gathered some of the easiest yet most effective steps on masonry pointing: joints recovery to spalling brick repair guide.
Masonry Repair Recommendations
If you notice crumbled mortar at the joints of old walls, remove the mortar with a chisel and fill the joints with new mortar. If there are cracked or fallen bricks from the wall, put in new ones. In both cases, you can repair without a trace by picking up bricks and marking the seams the way the other seams of the wall look.
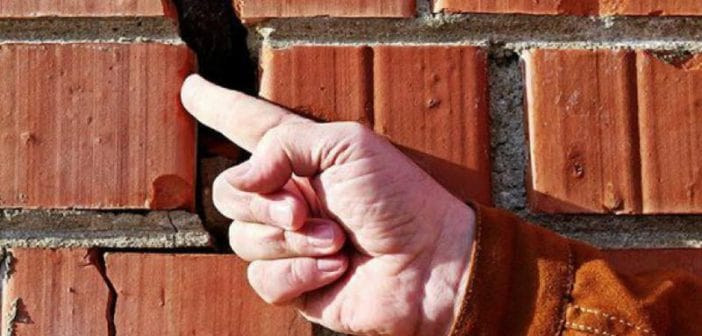
The mortar shrinks when it dries, and this can lead to cracks in new joints. New red bricks immediately gain moisture and expand slightly after manufacture. This expansion is usually sufficient for the thin cracks to close. However, new silicate (sand and lime) or concrete bricks shrink after some time. Wait until such a crack stabilizes, then coat it with slurry. To prepare the cement mortar, mix the cement with water so that a liquid composition is obtained that can cover the crack.
A wide crack or crack that widens after repair may be a sign of serious damage to the building structure. Do not try to repair such a crack in load-bearing or high wall, it is better to contact a specialist immediately. A wide crack in a low and non-load bearing wall can be covered with grout.
It is dangerous to leave damaged concrete paths or cracked steps without repair. The materials required for repairs may vary depending on the size and type of damage. Small cracks, for example, can be covered with grout; large ones require ordinary mortar. If the slabs do not stick on the steps, they can be glued with synthetic glue. However, if part of the step has collapsed, it will have to be re-made using the solution.
Remember that the solution must be kept moist for three to four days until it gains the required strength. If possible, cover the repair area with foil and pour water several times a day in hot weather.
Masonry Pointing
Seam Cleaning
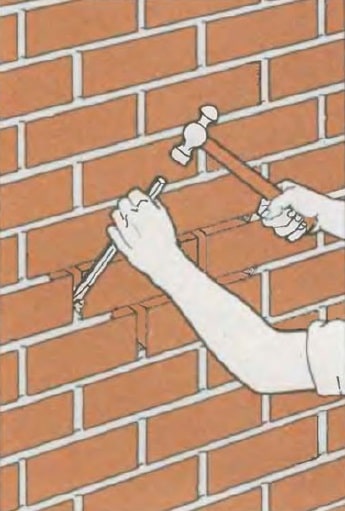
Cut the mortar out of the joint to a depth of about 16 mm with a bench chisel. To ensure good adhesion, clean the surface of the bricks at the junction. Thoroughly clean the joint with a brush to remove dust.
Caution: this work must be done with safety glasses!
Applying the Solution
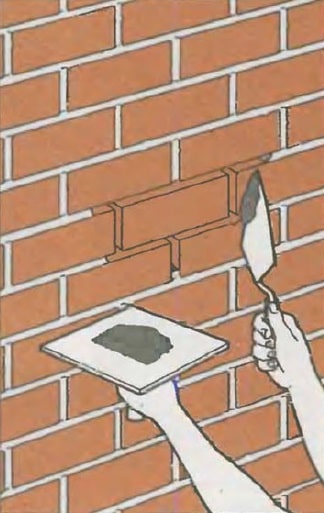
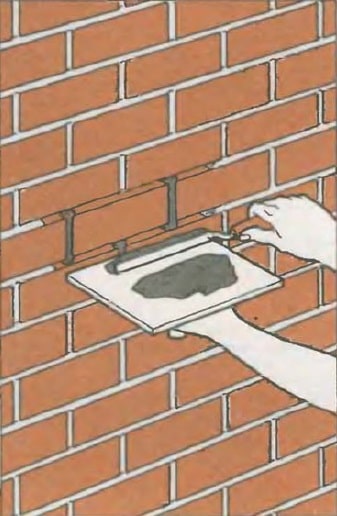
Moisten the seam with a brush with water or a spray hose. Put on a hawk (a wooden shield with a handle to hold the mortar during work) a layer of mortar 10 mm thick. With the lower plane of the mason’s trowel (which is smaller than the usual trowel) cut a thin slice of the mortar and press it to the seam. As you press the mortar, take it in with the lower cutting plane. To fill the solution with long seams, you can use the joint filler.
If you need to repair a large area, fill no more than two square meters of the wall with a solution at the same time. Work from bottom to top and from left to right, taking care of not to stain the bricks with the mortar.
How to Crack a Brick
Cracking across
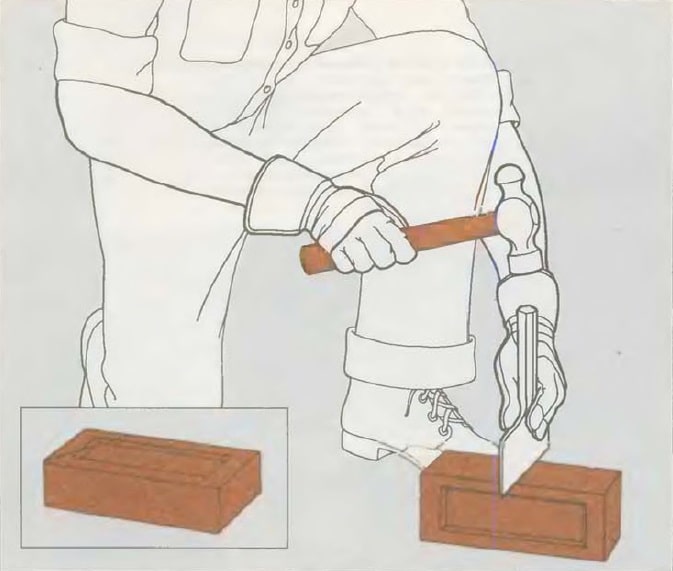
When working with bricks, you often need to split the bricks into small pieces. Using a pencil and a ruler, draw a split line around the brick. If necessary, draw an oblique line (image below). However, remember that it is more difficult to split a brick along an oblique line. Wear glasses to protect your eyes from splinters. Lay the brick on a layer of sand so that the part you want to crack at is facing you. Place the blade of the wide chisel on the split line and hit it with a hammer. Gradually deepen the groove around the brick. Listen to the sound of beats. When the brick begins to crack, the sound will become clunk, and you can finish the job with a sharp blow. Cut the irregularities with a trowel.
Cracking along
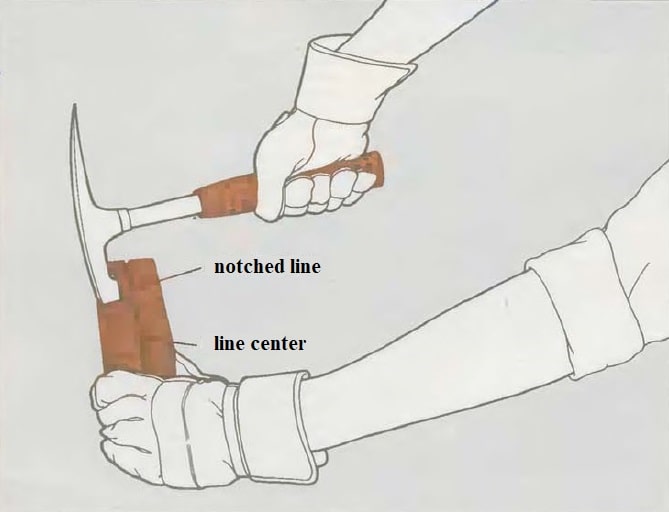
Draw a split line on all four sides of the brick, which will divide it in half. Cut the brick surface along the line with the square end of a pickaxe hammer (do not forget to wear safety glasses). For very hard bricks, use a chisel as shown above. Then take a brick stronger with one hand and hit it sharply with the flat end of the hammer near the center of the punctured line. (You may need to practice a little while you learn how to carefully break a brick in half with one stroke.) Level the brick surface with a thin blade of a hammer.
Cracking bricks along is harder than across. If you have an electric tool, you can use an abrasive disk instead of a hammer and a chisel to make a groove, and then crack a brick with a sharp blow of a hammer and a wide chisel.
Replacing Brick in Masonry
Removing one Damaged Brick
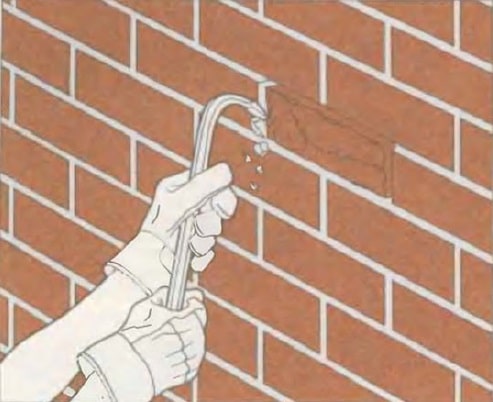
Remove the solution with a special crowbar if you can find one. If not, do it with a chisel. The crowbar is also good because it allows you to work with two hands, and this speeds up the work. Remove the required brick and clean the area from the remnants of the mortar.
Brick Replacement
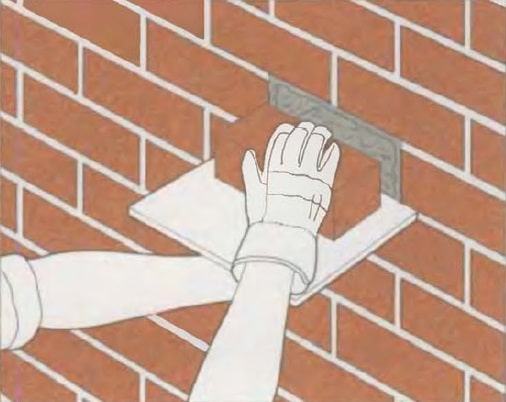
Choose a suitable brick or chop off part of it (as we reviewed above). Moisten the hole and apply a thick layer of mortar. Lay the brick on a hawk or mortarboard, placing its edge 15 mm above the row in which the brick will be installed. Drive the brick into the “nest” and trim the remaining mortar.
Spalling Brick Repair
Brick Replacement
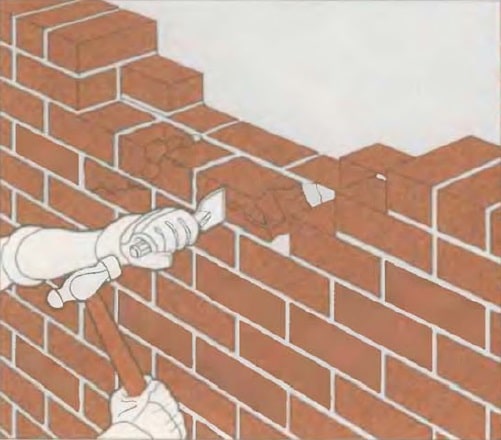
Remove all mortar around the damaged bricks and break the damaged or cracked bricks with a chisel. If the damaged section of the wall consists of several bricks, first remove the top, then the bottom.
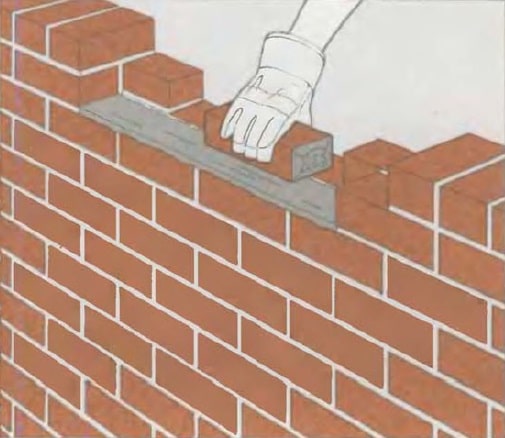
Brush clean the remains of the mortar and fragments of bricks. Dampen the damaged section of the wall, as well as new bricks with water and lay them in the same way as if you were laying a new wall. Put the mortar on the side faces of the bricks and lay them on the mortar, not forgetting to make a groove in it. When the mortar has set, embroider the seams with the same method that was used in the remaining seams of the wall. Soak the solution in a wet state for three to four days.
Repairing a Large Vertical Crack with Grout
Filling the Solution
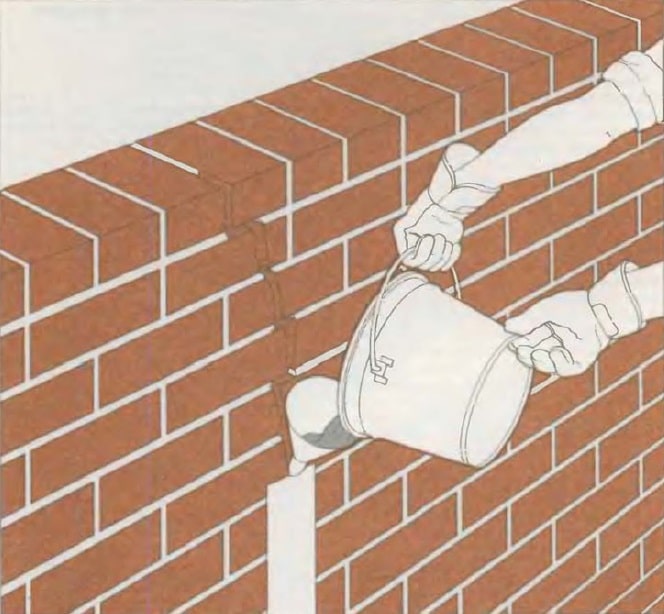
A long wide vertical crack in a low, not load-bearing wall can be repaired faster if, instead of filling the slots with a thick solution, pour the liquid solution into it. Clean the crack first. Prepare the solution in a bucket by adding so much water to it that the solution can easily pour out through a wide funnel. Do not add more water than required – the more water in the solution, the more it will shrink after hardening. Dampen the bricks around the crack with a wet brush. Then seal the bottom of the crack with a strong adhesive tape 300-500 mm long. Pour the solution through the funnel into the sealed portion of the crack (image below). If necessary, push the solution with a stick. Similarly, fill the next section with the solution. And so to the top of the wall, however, do not try to fill areas longer than a meter.
Installation of Formwork for Mortar
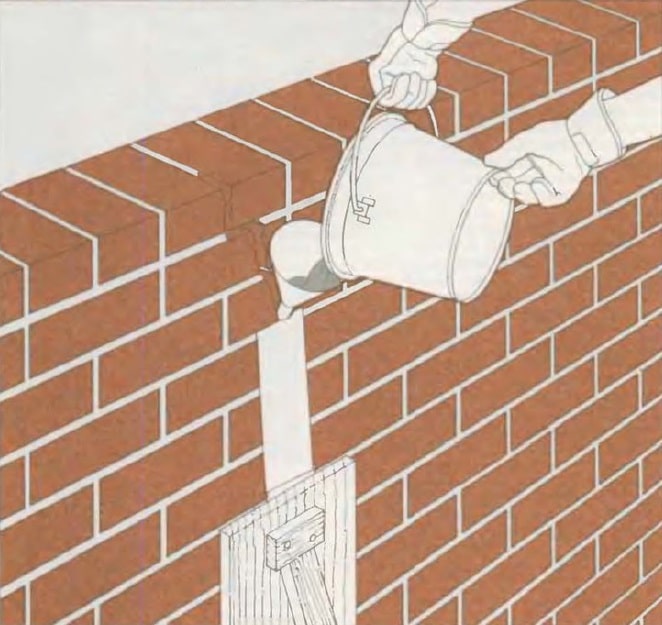
While the solution in the crack is wet, it must be held in place. Press the board to the adhesive tape until the solution solidifies (for two to three hours). Install this formwork immediately after pouring, if the tape adheres poorly, for example, to wet bricks. If the tape holds well, then the board can be installed after pouring about a meter long crack.
Attention! This method should not be used when repairing a load-bearing or high wall. Even a narrow crack in such a wall can be a sign of structural weakness, and you should definitely consult a professional.

